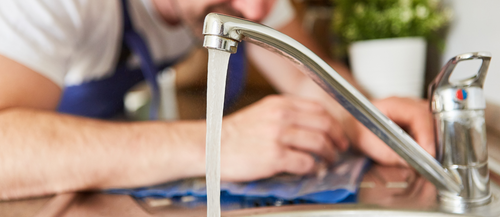
Do you have a leaking tap? Do you want to learn how to fix it yourself?
This article is for you!
Taps, like any other plumbing equipment, can start leaking sooner or later. At that moment, it is important to act quickly to limit the damage that a leak can cause. The simplest solution is to repair it.
If you don't know how, don't panic, we will teach you how to:
- Disassemble your tap
- Repair your tap
- Clean your tap
Prepare the toolbox and let's start repairing your tap.
Let's begin!
Why is a tap leaking?

There are several possible causes for a tap leak. The most common ones are:
- Worn seals: The rubber seals in the tap can degrade over time due to regular use, corrosion, or limescale buildup. The seals can then lose their tightness and cause a water leak.
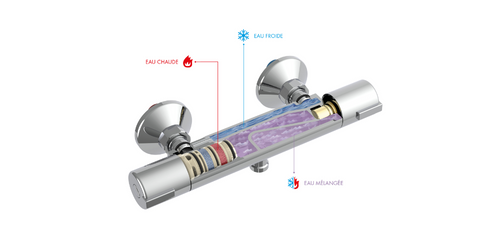
- Defective cartridge: The cartridge is an important part of the tap that controls the flow and temperature of the water. If it is damaged or worn, it can cause a leak.
- Loose nut: If the nut holding the tap in place is not tightened enough, it can cause a leak.
- Defective shut-off valve: The shut-off valve is the part that cuts off the water supply to the tap. If it is defective, it can cause a leak.
- Obstruction: An obstruction in the tap can also cause a leak. For example, a small object stuck in the cartridge or a buildup of limescale can prevent the tap from functioning properly and cause a leak.
How to repair a tap?
Now that you know why your tap is leaking, let's move on to its repair. This operation can naturally differ from one tap to another, but here, we will see the basis of a classic and simple repair.
1. Turn off the water supply
Before starting any plumbing operation, it is important to turn off the water supply to avoid the risk of flooding or water damage. You can usually find the shut-off valve near where the tap is located or near the water meter.
The shut-off valve is often located under the sink or washbasin, or in the cupboard of the bathroom. It is important to know the location of the shut-off valve before undertaking any plumbing repair.
2. Unscrew the tap button
To repair a leaking tap, it is usually necessary to unscrew the tap button to access the internal components of the faucet. The tap button may be held in place by a screw or simply snapped in.
- In the first case: you will need to use a screwdriver to unscrew the screw that holds the button in place.
- In the second case: you can remove the button by pulling it easily towards you with your hands or using pliers or a similar tool to help remove the button safely.
Once the button is removed, you should be able to access the internal components of the tap, such as the cartridge, to repair or replace them if necessary.
3. Remove the cartridge

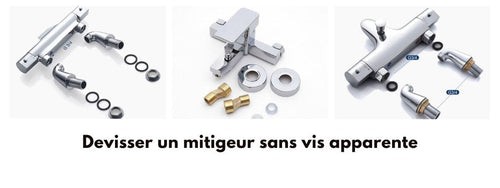
If you have diagnosed that the cartridge is the cause of the leak in your tap, you will need to remove it to replace it. To remove the cartridge, it is often necessary to remove the fixing collar that holds it in place, as well as the screw that secures the cartridge.
You can usually remove the collar by unscrewing it with an adjustable wrench or pliers, and then remove the screw with a screwdriver. Once you have removed the collar and the screw, you can remove the cartridge from the tap by gently pulling it towards you.
It is important to note that the exact steps for removing the cartridge may vary depending on the model and manufacturer of the tap, so it is recommended to consult the manual or search for specific instructions online for your tap model.
4. Replace the seals
If you have diagnosed that worn seals are the cause of the leak in your tap, you will need to replace them to repair the leak. Seals are usually found in the cartridge, but they can also be located in other parts of the tap, such as the base of the faucet or the fittings.
To replace the seals, you will need to disassemble the tap, remove the worn seals, and then install new rubber seals in their place. It is important to ensure that the new seals are the right size and type for your specific tap.
You can often find replacement seal sets in hardware stores or DIY stores.
5. Clean the cartridge
Sometimes, the cause of a tap leak can simply be limescale buildup, limescale, or dirt on the cartridge, which prevents the cartridge from functioning properly.
In this case, you can clean the cartridge to solve the problem. To clean the cartridge, you will need to first remove it from the tap by following the appropriate steps for your tap model.
Once you have removed the cartridge, you can use a toothbrush or a soft brush to gently scrub the surface of the cartridge and remove any buildup. You can also use a cleaning product to remove stubborn deposits.
Be sure to rinse the cartridge well before putting it back in place. If the cartridge is damaged, it is better to replace it rather than clean it.
6. Reassemble the tap
Once you have replaced the defective internal components or cleaned the cartridge, you can reassemble the tap in reverse order of the way you disassembled it.
It is important to ensure that all parts are properly positioned and secured in place before restoring the water supply and using the tap again. Make sure that all screws and collars are tightened to avoid any future leaks.
When reassembling the tap, you can also take the opportunity to lubricate the moving parts with faucet grease. This will help extend the life of the tap and prevent leaks in the future.
What to do if the tap leak persists?
We have reached the conclusion of this article on tap repair. You now know the different steps to follow to repair a leaking tap and the different reasons that can cause a leak.
However, if the leak persists, it is advisable to call a plumbing professional who will be better able to repair your tap. Otherwise, you can also take this opportunity to replace and change the style of tap for your home.


